
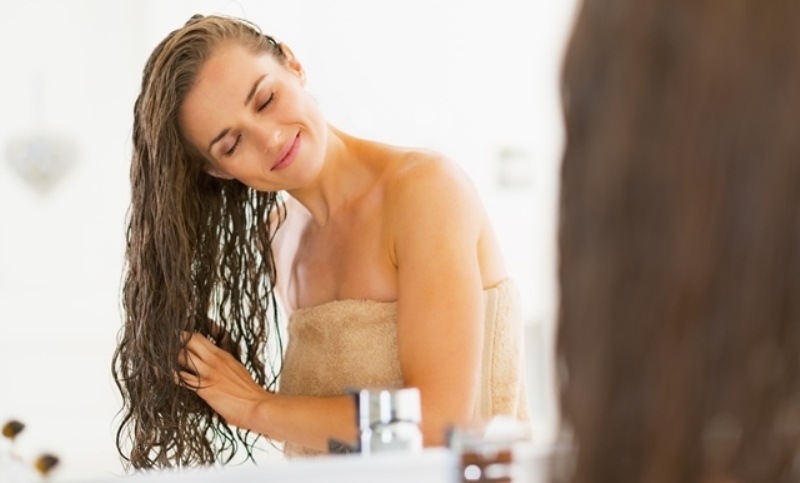
Scared of getting into the shower before work when there is no time to blow-dry afterward? Well, I think we’ve got you sorted! To make sure that transforming the turned-off-the-faucet-right-now hair into something sleek and elegant isn’t a problem for you, we’ve racked our brains and come up with 6 looks that can end your hunt of how to style wet hair. Each of these styles can be replicated at home (or even your gym bathroom, for that matter!). They require very few or no products, and can get you ready to walk out of that door in ten minutes!
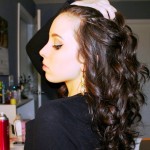
Suggested read: 12 unusually stunning ways to style your curly hair
Read on and become a pro with all tricks up your sleeves on how to style wet hair. All of these are a far cry from the messy bun that you wear when you sleep through your alarm. If your colleagues ask you how you found the time, just smirk at them… and forward the link, of course! 😉
1. Upside-Down French Twist
For the upside-down French Twist, you need to take all your fixed ideas about the French Twist (stiff, out-of-touch and prissy), and turn them on their heads to create an unfussy, super chic version. Like, literally! To get this look, work backwards. Don’t roll the twist up the head, but down.
Begin with several handfuls of mousse (our pro suggests the Shu Uemura Ample Angora) from the roots to the ends of your wet hair. This will give your hair a separated texture that looks ethereal, yet not too polished.
Now, gather all the hair over your head as if you are about to tie a ponytail, and then, roll it down the nape of your neck. While doing the traditional French Twist, you need to roll up to create the illusion of height. But here, you have to go low and more unbalanced. It is a chance for you to have some fun, so don’t miss out!
The remaining hair should be tucked in a twist, and held with five large U-shaped pins. This way you can secure the style. To keep them from falling out, while pinning them, slide them through the edge and back into the seam. Make sure you do that in quick right-to-left motion.
To finish, gently massage your head with your fingers. This will break the hair, and give it the necessary carefree quality.
2. Chic Loop
You have seen this popular look on the fashion runways, lately. Want to know how to get the chignon’s older but cooler sister? Read on!
According to Fugate, a professional hairstylist, “The Chic Loop is beautiful, dramatic, flirty, and chic, of course! Let’s call it the anti-bun.”
This hairstyle is all about precision unlike the French Twist. Begin by creating a strong middle part, and if you have straight hair, comb a shine spray. If you have curly hair, then try a flexible gel. Apply it from the root to the tips of your hair.
Next, tie your hair into a ponytail at the nape of your neck. Make sure it is tight. Fugate says,
“That creates a beautiful silhouette along the neck.”
While fastening the pony with an elastic, pull your hair halfway through your last rotation so it forms a loop. You will be left with about 2 inches of hair at the ends, and 5 inches if you have long hair. Hold the loop in one hand and the end in another. Wrap the rest of your hair around the base. With bobby pins secure the hair, crossing them over under the elastic, in the same way you would if you were wrapping a strand of hair around your ponytail. This is a little detail that can transform the gym-look into something extra-ordinary.
Finish by applying some gel or spray to smooth the hair, calming the frizzy. It’s important for your hair to look glossy when flaunting a chic look.
3. Segmented Bun
Pulling your hair into a braided bun isn’t that big a deal, but it isn’t fun either, right? Fugate says,
“The sleek parting and cool definition is what gives this style attitude. It looks intentional, like you put thought into it.”
Use a styling cream to smooth your hair, and using a comb divide it into clean sections of 3 from your hairline to your neck. Now, brush each section to tie a low but tight ponytail with black elastics. Make sure you position the ponytail at the center, a little above the other two.
Next, take the ponytails and create a three-strand plait. Tie it off at the ends. Now, wrap your braid into a bun, by covering the top elastic while allowing the two side elastics to show.
“Seeing those black elastics give it a cool, sporty vibe,” according to Fugate.
Pin this bun using bobby pins, leaving the tail end of your braid. For a graphic finish let your hair fall eye-catchingly to one side, and work some gel through it. Before you walk out of that door, check out the art of a hairstyle you’ve created in a double mirror. Pretty AF, right?!
Suggested read: 14 most flattering medium length hairstyles for round faces
4. Four-Strand Braid
French braids and fishtails have become easy-peasy for you, right? Want to impress folks in school? It’s high time you get a hold on the four-strand braid. The cool rope-texture effortlessly covers the fact that your hair is wet.
To get the look, brush your hair and pull it all behind your shoulders. Now, divide the strands into 4 neat sections. If you have got fine hair work some shine spray, but if your hair is wavy and thick, go for a cream. For those with coarse or curly tresses, gel is the best option.
Since it gets a little complicated from here, I am keeping the steps simple and short.
Cross the second section of your hair from your left over to your right. While holding the section on the right, take the other two sections and twist them. Your braid will now have a ropey texture from all sides. Now tie it with a clear elastic, and if the hair near the nape starts drooping, use some pins to restrain it. The pins will create a rad twisted effect. To make the look extra polished, use some shine spray.
Pro Tip: Fugate suggests that you work a deep conditioning mask through the strands before you begin braiding. This way, you will have healthier and smoother hair when you let it loose at the end of the day.
5. The Vintage Wave
The vintage wave hairstyle looks flattering on every face shape. These sculpted waves are classic but never boring!
Begin with freshly washed or spritzed down hair. Use a good styling spray, say, Kérastase’s Spray À Porter, to add some grip to your hair. Now create a deep side part using your fingers, and start making pin curls. Take about a two-inch section of your hair, and drape it around two of your fingers, multiple times. This will give a medium-sized curl. Once your hair is completely coiled, carefully slip it off your fingers, but make sure the coil shape is intact. Now pin the coil to your head. This is your first pin curl. Keep repeating the same with the rest of the sections of your hair, until your entire head is set. Leave the bangs in front for last. You can paint the bobby pins with a nail polish of your favorite color to give it a funky look.
To give your coiffure the finishing touch, shape the bangs in front or any front-layering into coils. After the coils cool from the heat of your blow-dryer, slowly unwind the pin curls. Lastly, add some polish to the look with a boar-bristle brush. Using some hairsprays, you can ensure that the screen-siren waves last all day!
6. On A Roll
For this look we will need paper towels. Scroll down to know how!
Make an off-center (just slightly) part in your damp hair, and using a styling spray, prep the locks. Tear off a paper towel from the roll. Now fold it about an inch wide. Separate about an inch-wide section of your hair, and holding the rolled paper towel at its ends, roll your hair onto the towel. Tie the paper towel ends together, creating a rag curl. Keep rolling and tying one-inch sections of your hair until your head is totally set. Now use a blow-dryer to give the look that punk it needs. Once your hair is completely set, start unraveling the curls. Your hair will suddenly look very voluminous and healthy. Massage the hair with a smoothening gel to give your crown that additional boost. Hit some spray, and you are ready to paint the town all red!
Suggested read: 14 effective home remedies for ingrown hair that work wonders
Liked what you just read? Guess what, there’s more! For tons of beauty tips, news and tutorials like this one on how to style wet hair, subscribe to our daily newsletter today! We would love to visit you every day! 
Featured image source: Shutterstock


