
If you have no experience with makeup whatsoever, no one is judging you. In a world of Instagram trends and makeup fads, a lot of people who have no idea about makeup, want to start, and we truly believe it is never too late. If you have decided to try your hand at makeup, then it is likely that your lipstick and we are here to show you exactly how to wear lipstick, so that you look like a pro.
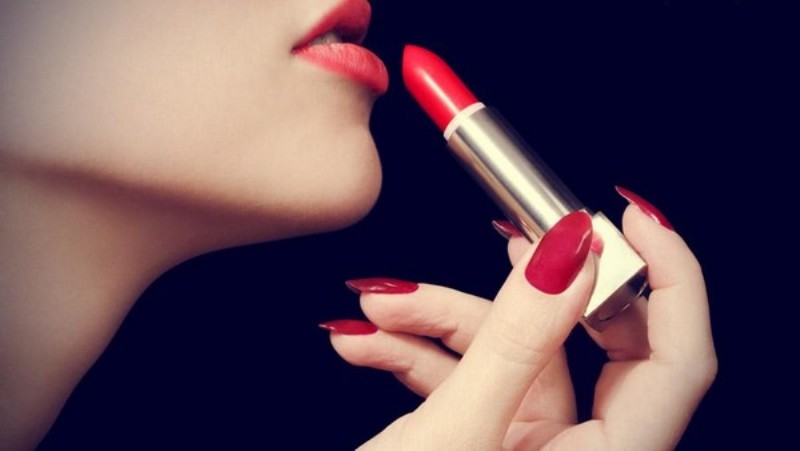
Image source: Google, copyright-free image, under Creative Commons License
A good lipstick, when worn properly can change the look of your entire outfit. Sometimes it so happens that you have a bomb shade, but because you don’t apply it well, it bleeds all over your face and disappears sooner than you’d like. However, it may also happen that your entire outfit is ruined because of the wrong lipstick shade for your skin tone, even if you have managed to apply it properly.
Suggested read: How To Choose The Right Lipstick For Your Skin Tone
Choosing the right lipstick, and then wearing it is an art in itself, which you need to master in order to look like the bawse that you are, every time you step out of the house. Here is the most complete and comprehensive guide on how to wear a lipstick, and own it.
Prepping Your Lippies
Before you actually get hold of a lipstick, you need to prep you lips so that you have a smooth, soft base to work on. Why do you need to engage in an entire routine before applying lipstick? The whole idea is to make the process of applying lipstick simpler, as smoother surfaces not only makes for smooth application, but it also helps your lips remain moisturized, and the color to stay in place for longer. Here is the complete lip care routine you need to follow before you start applying lipstick.
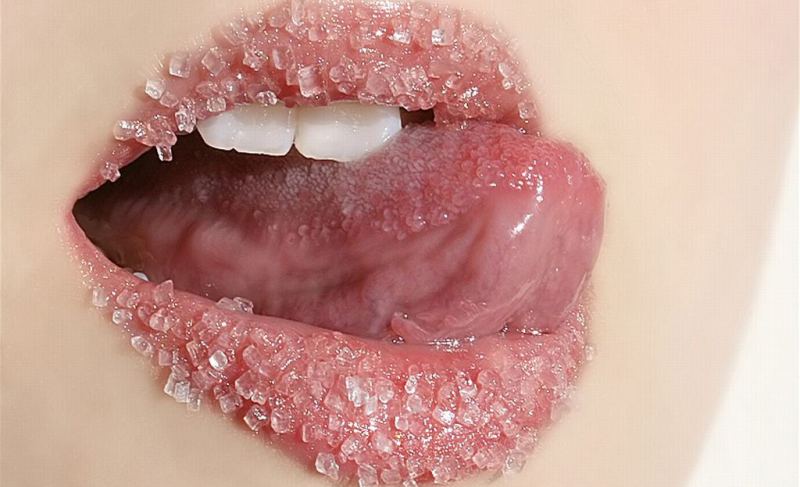
Image source: Google, copyright-free image, under Creative Commons License
You should not that this isn’t a onetime thing. When you are taking care of your lips, a few regular habits can go a long way in keeping your lips naturally soft. That way you won’t have to do this every time you apply lipstick. You can do ahead directly. Here is a basic lip care routine you can follow for a flawless application of lipstick.
- Exfoliating
Exfoliating your lips ensures that you get rid of all the dry, dead cells that accumulate on the surface, these dead cells make your lips look dry and chapped. The best way to get rid of them is to put a little lotion on a soft bristle toothbrush and rub your lips in circular motion. You can do this without the lotion as well, to get soft lips. This also increases circulation to your lips, which makes it look plump and red, naturally.
- Moisturizing
The next step, after you have exfoliated, is to help them retain moisture. Even though there are a number of great cosmetic moisturizers in the market, nothing works better than petroleum jelly. Petroleum jelly can help lock in the moisture in your lips, and make them ready for the next step. You can also use cream to help soften your lips.
- Lip balm
The whole point of this step is to ensure that your lips remain moisturized and soft, even after you have applied lipstick. Wear lip balm to bed, or before you apply lipstick, so that you have soft lips at all times. If you want your lipstick to be matte, gently remove the excess lip balm with a cotton ball.
Suggested read: 15 Best Liquid Lipsticks You CANNOT Afford To Miss
You can accomplish all three processes by making a DIY lip scrub with brown sugar, honey and olive oil, which can exfoliate, moisturize and offer long term care for your lips, when you use it on a daily basis.
Now that your lips are pink, plump, super moisturized and ready for your lipstick, you need to get hold of a number of tools and handy products to make your application process much easier.
What You Will Need
If you have been under the impression that you need for you lipstick to look good is, well…you lipstick, then you are absolutely wrong. You need a number of things to ensure you get the most out of your lipstick. Before figuring out how to wear lipstick, let’s check out the paraphernalia you will require.
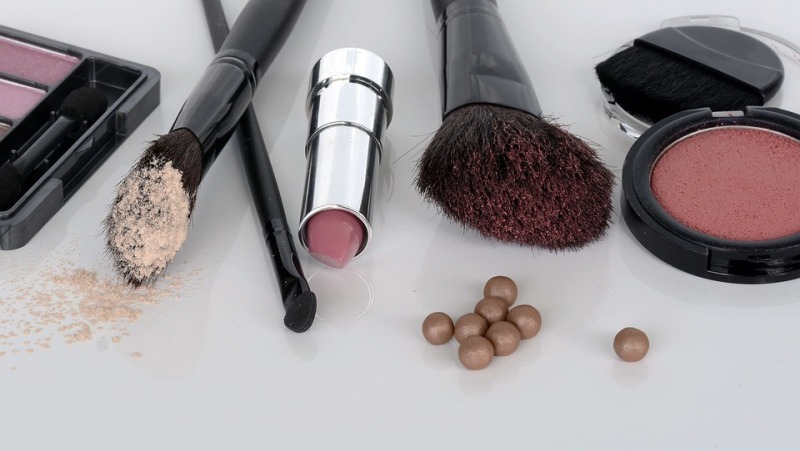
Image source: Google, copyright-free image, under Creative Commons License
- Concealer
You might be surprised as to why you will need a concealer when doing your lips. The fact is, a concealer is used immediately after you have moisturized and prepped your lips for the lipstick. It helps to remove the lines which may make your lipstick look weak and faded after a couple of hours. A concealer also helps make the application smooth, so that your lipstick doesn’t tug at your lips when you are applying it.
- Foundation
Like your natural makeup routine, after concealer you should use a tiny bit of foundation on your lips, so that the color of your lipstick pops. The natural color of your lips is several shades darker than your skin color, and it may affect the shade and pigment of the lipstick. To bring out the best in your lipstick color, use the same foundation that you use for your face, on your lips as well.
- Beauty blender
You will need a beauty blender or a makeup sponge to apply the concealer and the foundation on your lips evenly. When you are using the beauty blender, make sure that you smile, so that even the grooves and lines in your lips are filled thoroughly.
- Lip liner
A lip liner is possibly the most important tool you will need when you are applying lipstick, because it is the only thing that prevents the lipstick from bleeding all around your mouth. It also makes for a great base for the actual lipstick, and coloring within the lines always helps.
- Lipstick brush
If you are a novice, it is always advisable to start with a lipstick brush instead of the actual lipstick. The thin surface area helps you control the application better and you can draw better lines and fill in the gaps with much more precision when you are using a brush. Even after you become a pro, a lipstick brush will be an indispensable item for your lipstick routine.
- Lipstick
You will of course, need the actual lipstick. If you have dry lips, try to go for a moisturizing lipstick. There are various other kinds of lipstick, and you need to go for whichever one suits your skin type and complexion best.
How To Apply Lipstick
Now that we are ready with prepped lips and all our tools, it is time to apply the lipstick, and look like a drop-dead gorgeous diva. Here is a step by step guide on how to apply lipstick, with a bunch of pro tips to ensure you get it the first time.
Suggested read: All You Need To Know About How To Wear Red Lipstick
STEP 1: Line your lips
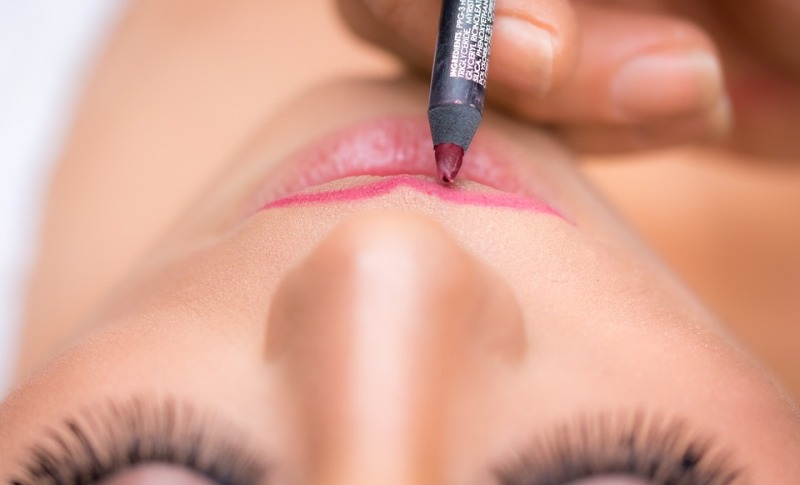
Image source: Google, copyright-free image, under Creative Commons License
The first step is to line your lips. This has a number of purposes, which will make your lipstick look like the bomb. A lot of the times, people forego this step, which shouldn’t be the case, because without lip liner, your lips might bleed all over the place and blue the natural lines of your lips as well.
It is always best if you use a lip liner which is the same shade of your lipstick, or a couple of shades darker. Take the pencil and draw carefully around the natural shape of your lips (since you aren’t a pro at it, it is best to not try to overdraw this time around). Using lip liner will naturally make your lips looks bigger. Emphasize the cupids bow and the round bottom of your lower lip.
Pro tip: If you can’t find a lip liner that looks natural with your lipstick shade, just use a clear lip liner to make your lips look bigger, and to prevent your lipstick from bleeding.
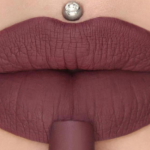
STEP 2: Lip Contour
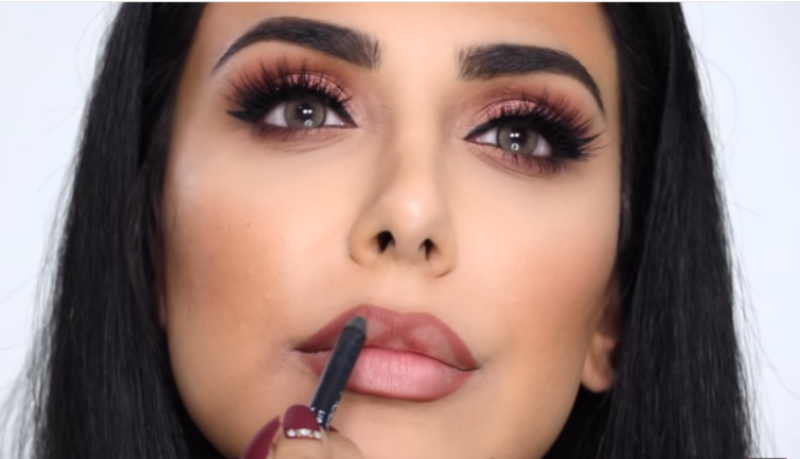
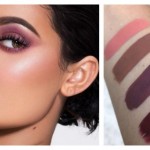
Image source: YouTube/Huda Beauty
You don’t have to freak out- lip contour isn’t as complicated as it sounds. After you have lines the natural border of your lips, you can use your lip pencil to make a little cross, following the lines of your cupid’s bow. You then have to draw three lines on your bottom lip, one on the centre, and two more on either side. Even though it might seem pointless, it helps the application process greatly and helps your lips look plump and luscious.
Pro tip: Instead of drawing hard lines around your lips, blend the color into the plump parts of your lips so that it looks much more natural. You can then use your liner to draw the smaller lines for added effect.
STEP 3: Time for lipstick

Image source: Google, copyright-free image, under Creative Commons License
Choose your favorite lipstick. There is a whole other guide you can follow on how to go about that process. Now that your lips are structures and lined, take your lipstick brush and take a generous amount from the stick. Start applying from the centre of your lips towards the edges and make sure you color within the lines. After the first layer has dried a little, use it to apply a second layer, so that the color pops, and it stays on for longer. If you are uncomfortable with the brush, apply the lipstick directly to your lips, while making sure that your lips are generously covered.
Pro tip: When you are applying lipstick, make sure that you don’t drag your lips with the lipstick. Apply gently, and apply twice, so that you have control over your makeup, and the color shines through as well.
STEP 4: Remove excess lipstick
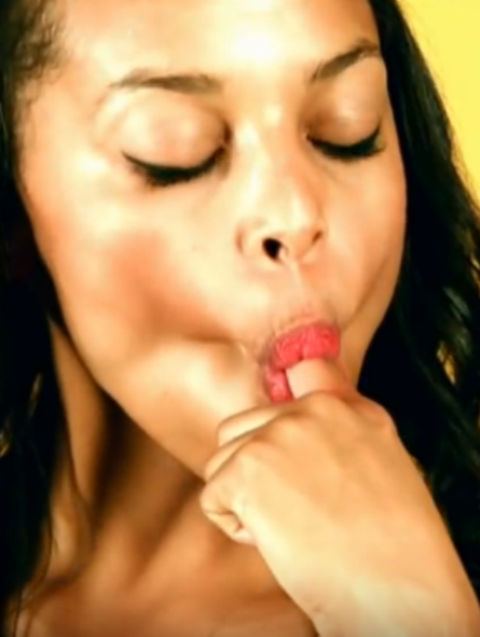
Image source: YouTube/Howcast
Removing excess lipstick can enhance your lipstick experience to a great extent, and save you from a number of embarrassing and disastrous situations. To remove the excess lipstick, pop your index finger into your mouth and gently pull it out while holding it with your lips in a puckered position. This removes all the lipstick that could otherwise have ended up on your teeth.
STEP 5: Conceal some more
Applying a teeny bit of concealer around your lips can also prevent lipstick from leaking out during the day, and prevents the skin around your lips from sweating and becoming dry, so that you have lovely, popping lips, with perfect lipstick, throughout the day.
Suggested read: We Bet You Didn’t Know These Amazing Facts About Your Beloved Lipstick
Additional Lip Care Tips
Now that you have successfully learnt how to wear lipstick, it is time to rock it like a pro. Here are some additional tips you can use to make your lipstick look flawless, every time!
- Lick glasses before you drink from them, so that your lipstick doesn’t get on it and fade.
- Carry a lip balm with you; when you start seeing your lipstick fade, put on lip balm to get a fresh layer of a different shade of lipstick.
- If shimmer and gloss is not your thing, turn it into a matte base by pressing a tissue paper on your lips and dusting it with a little talcum powder or face powder.
- To the edges of your lip liner, you can either your finger with a little Vaseline, or a Q-tip
- Applying a teeny bit of highlighter to the area just above your cupid’s bow makes your lips look plumper and more glamorous.
- Using translucent powder over your lipstick makes the color last much longer that you normally would have.
- You can make you own DIY lipstick with crushed eye shadow and Vaseline!
Once you have mastered the basic of how to wear lipstick, you can play with it all you want and become an expert in handling lipstick and all the makeup trends and experiments that come with it
Feature image source: Google, copyright-free image, under Creative Commons License

